

Get to Know your Serger/Overlocker
Did you get a serger under your tree this year?
One of the biggest steps to make in starting a new hobby is to.... well START! When first getting into sewing it can be overwhelming to see all the different options for machines out there.... Sewing, Embroidery, Overlock, Coverstitch, Lockstitch, Chain Stitch, Industrial, Longarm 🤯 It can all get overwhelming, and that's not even factoring in all the different types of fabrics and notions out there.
@mcumings Let’s be FRIENDS!! 💕💕 #sew #sewing #sewingtiktok #sewingforyoupage #sewingblogger #sewingmachine #friends ♬ Original sound mattmellish - Jocelyn
That's why for the next few weeks we want to help everyone, whether you are just getting started or are a seasoned pro, learn more about some of the most common machines we use when making garments.
The VERY first step I recommend is to take it out of the box!!!! I can't tell you how many times I've heard someone say they have a serger but they are too scared to take it out of the box. 😔 Just remember that it is a machine that will help you with your sewing techniques and that it might take a bit of prep to make sure it runs smoothly, but if you treat your serger with kindness making sure it stays clean and listening to it when it starts to tell you something is wrong, than you will find it will become one of your most loved machines in your collection!!

Because there are so many different brands of machines out there and they each have different methods for threading etc we really recommend making sure you read through your manual before starting your relationship with your new machine. It is especially important to read the manual for your serger/overlocker because you need to thread them in a very particular order. If you miss a step or do something out of order your machine will not stitch. When I was first starting on my serger I could never remember what went when, so I actually wrote on my machine using a sharpie the number order each spool needed to be threaded in!

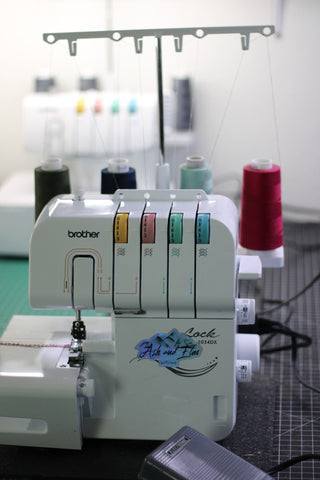
Your serger/overlocker will have a space for 4 threads, a lower looper, and upper looper, and a left and right needle. It is very important that each of these are balanced correctly or you will have issues with skipped stitches, bunched stitches, or even worse no stitches at all. 😫
That's why the next thing I would really recomend doing is to find the perfect tension for the fabric you will use most often on your serger. This is a great step to do with every new machine you get as each machine (even if they are the same brand and same model number) has it's own preference. I use a LOT of French Terry, so I went through and found my ideal tension using a scrap of French Terry, but this method will work no matter what fabric base you prefer.
- Make sure you are using the correct needle for the type of fabric you will be sewing. I didn't realize how important of a role needles play in sewing and honestly was surprised to find out there were more than just universal needles out there 🤪 If you are sewing primarily with knits you are going to want to use a ball point needle as these will seperate the fiber strands instead of pierce them. If you are using an especially stretchy fabric (ie Double Brushed Poly) you are going to want to use a stretch needle, this will help prevent skipped stitches.

- Put a different color thread in each spool holder. I know that the machine probably came threaded with a different color in each one, but I really recomend using the same thread you plan on using for your projects as the quality of stitches can change based on the quality of thread you use!

- Turn all your tension dials to zero.
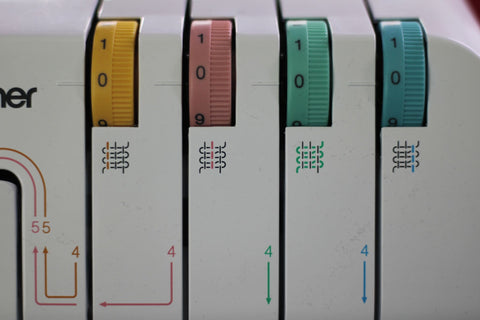
- Using your piece of scrap fabric run your stitches about two inches at a time adjusting the tension up between 1 steps at a time. So starting at zero you would adjust up to 1 and then from 1 you adjust to 2 etc. I like to stop between each adjustment and write the numbers I used on the fabric next to the stitches to help me remember what was what!

- Once you've gone through from 0 to the highest tension on your serger you will examine your scrap to see which numbers create stitches that are starting to look correct.

- Making small adjustments now you are going to go through and do the same step as before but instead of starting at zero you are going to start at the the tension that your stitches looked good on. Just like in the previous step you will make small adjustments every 2 inches or so, but this time I recomend focusing on 1 thread at a time. So starting with your lower looper thread tension make small adjusments until you get to the number that your stitches weren't looking ideal anymore. Examine the scrap just looking at the lower looper thread to see what number looks the most ideal.

- Do that one thread at a time until everyone of your stitches looks ballanced.

- Now that you know your ideal tension for the fabric you work on the most I recommend either marking that on the machine or writing it down in a notebook somewhere.

- You are either call it good and make adjustments when working with different fabric bases if you see they need them, or if you are wanting you can find the ideal tension for each base you use. Personally I find that once I get my ideal tension I rarely have to make changes and that I would rather just adjust as I see problems come up.

Now that you have your ideal tension, the next thing I am going to recommend today is that you find and mark the different seam allowances on your machine. Starting at the needle place a ruler underneath. Make sure the end of the ruler is positioned underneath the left needle and then mark seam lengths from that position. I find that most patterns use either 1/4, 3/8 or 1/2 seam allowances so those are the ones that I have marked on my machine! I definitely recommend this step because not only does it make for a handy guide while sewing, but I find that it helps me keep my stitches straighter.

The last thing I want to mention with your serger is to make sure you give it a good cleaning! In between each project open up the cover where the looper threads go and just give it a bit of a dusting and brush it out with your machine brush or a makeup brush. I would also recommend opening the back of the machine and giving that a good cleaning at least once every couple of months. If you sew quite a bit, or you made a project using especially fluffy or linty fabrics (think minky, fleece, velvet etc) than you are going to want to do this at least once a month or after sewing with those messier fabrics.
@mcumings Those scissors were missing for WEEKS!! 😵 Duet and show your machine 💕 #sew #sewing #sewingtiktok #sewingforyoupage #sewingmachine #ashandelmlimited ♬ Monkeys Spinning Monkeys - Kevin MacLeod & Kevin The Monkey
Well that's the basics to get started with your serger!! Starting next week we will delve a little deeper into a few different techniques you can use your serger for so stay tuned!!
xoxo- Melissa 😘